Manage user roles
Explanation on how to create or edit a user role.
Creating or editing roles.
Make sure you have read and understand the Roles and permissions important concepts.
- Go to
 Admin → Access Management → User roles.
 - Click Add role or Edit Role.
- Modify the permissions as required. Use the search field to quickly find a specific permission.
- Optionally, restrict the allowed login times.
- Click Save.
Carefully consider when granting the permission to manage users and roles
Be aware that the 'manage roles' permission allows the create ANY role with ANY set of permission, regardless of the current permissions of the user who is editing the role. This means that a user with the 'manage roles' permission can grant himself and others any permission, potentially granting himself all permissions in the organization. There is currently no hierarchical restriction on granting permissions.
In other words, grant this permission to trusted users.
'View' and 'Manage' data permissions
Most data objects have a 'View' permission and a 'Manage' permission. For example 'View geozones' and 'Manage geozones'.
If you grant the 'Manage' permission, then you must also explicitly grant the corresponding 'View' permission. The role editor will automatically enable such dependent permissions. However, it is afterwards still possible to create combinations that do not make much sense. This behavior is a conscious design choice, as it makes the Webclient API permission checks clean and straightforward.
Other data objects have more fine-grained permissions, allowing even more fine-grained control of the different actions that can be performed.
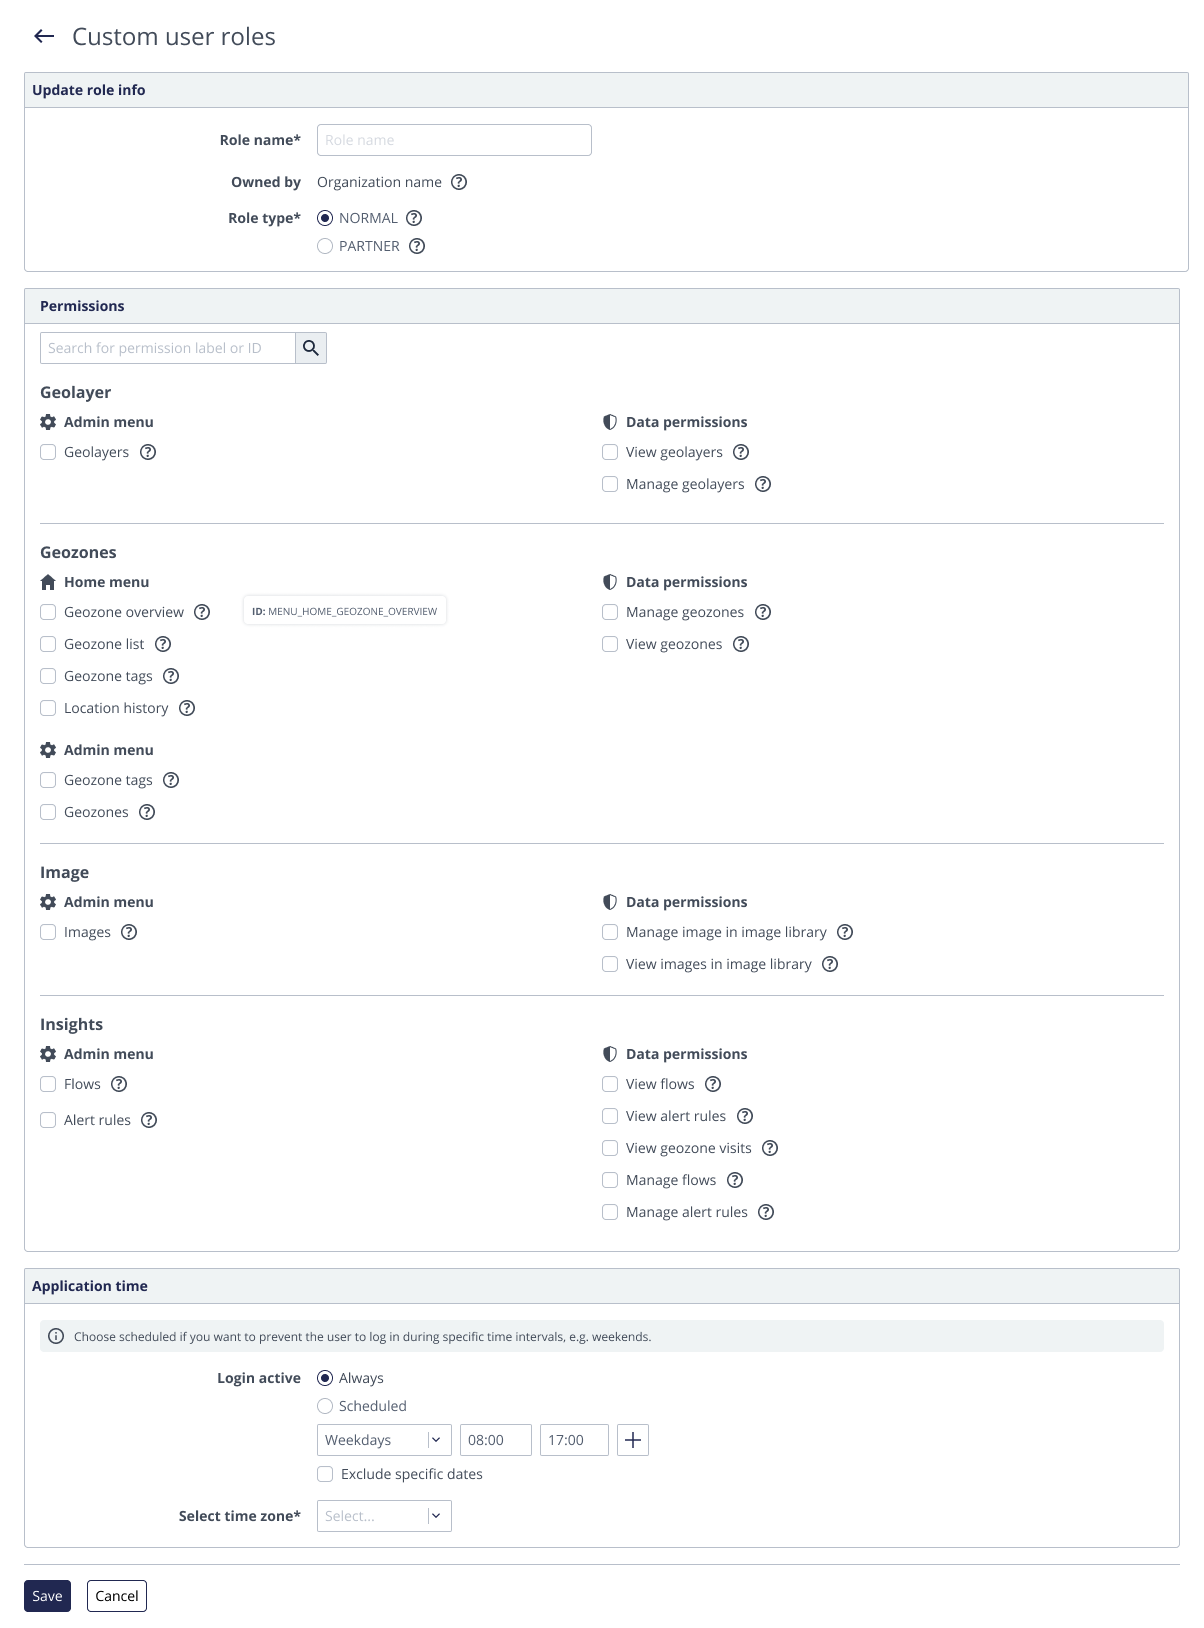
Functionality and layout of the role editor
The user interface has the following functionalities:
- Categories: Related permissions are grouped into logical categories. This is just to organize the large list - it has no further impact.
- Tool-tip: The tool-tip next to a permission will show the 'permission ID' (which is not affected by translation).
- Search: Use the search field to quickly find a permission.
- When you tick the check-box to grant a UI permission (a home or admin menu item)
in the left column, then automatically the related data permissions will be
ticked in the right column. This is a convenience feature.
- For example, if you tick the check-box for the 'Manage users' admin menu permission, then automatically the 'View users' and 'Manage users' data permissions are granted. This is the most common choice.
- If, for example, the role should only be able to see the list of users (in the admin panel), without being able to create/edit/delete users, you can then untick the 'manage users' data permission ; but leave the 'view users' ticked.
| Field | Description |
|---|---|
| Role info | |
| Name | Name of the role, has to be unique. |
| Owned by | The organisation owning the role. |
| Role type | NORMAL / PARTNER. Determines to which user account types the role can be assigned. |
| Permissions | |
| Menu item permissions (UI permissions) | The left part of the panel contains all available navigation permissions. |
| Data permissions | The right part of the panel contains all available data permissions. |
| Application time | |
| Always | No constraints, user can always login |
| Scheduled | Build a complete schedule which defines when a user can login. |